Showing posts with label chocolate. Show all posts

Monday, March 17, 2014

Irish Car Bomb Cupcakes - Happy St. Patrick's Day!


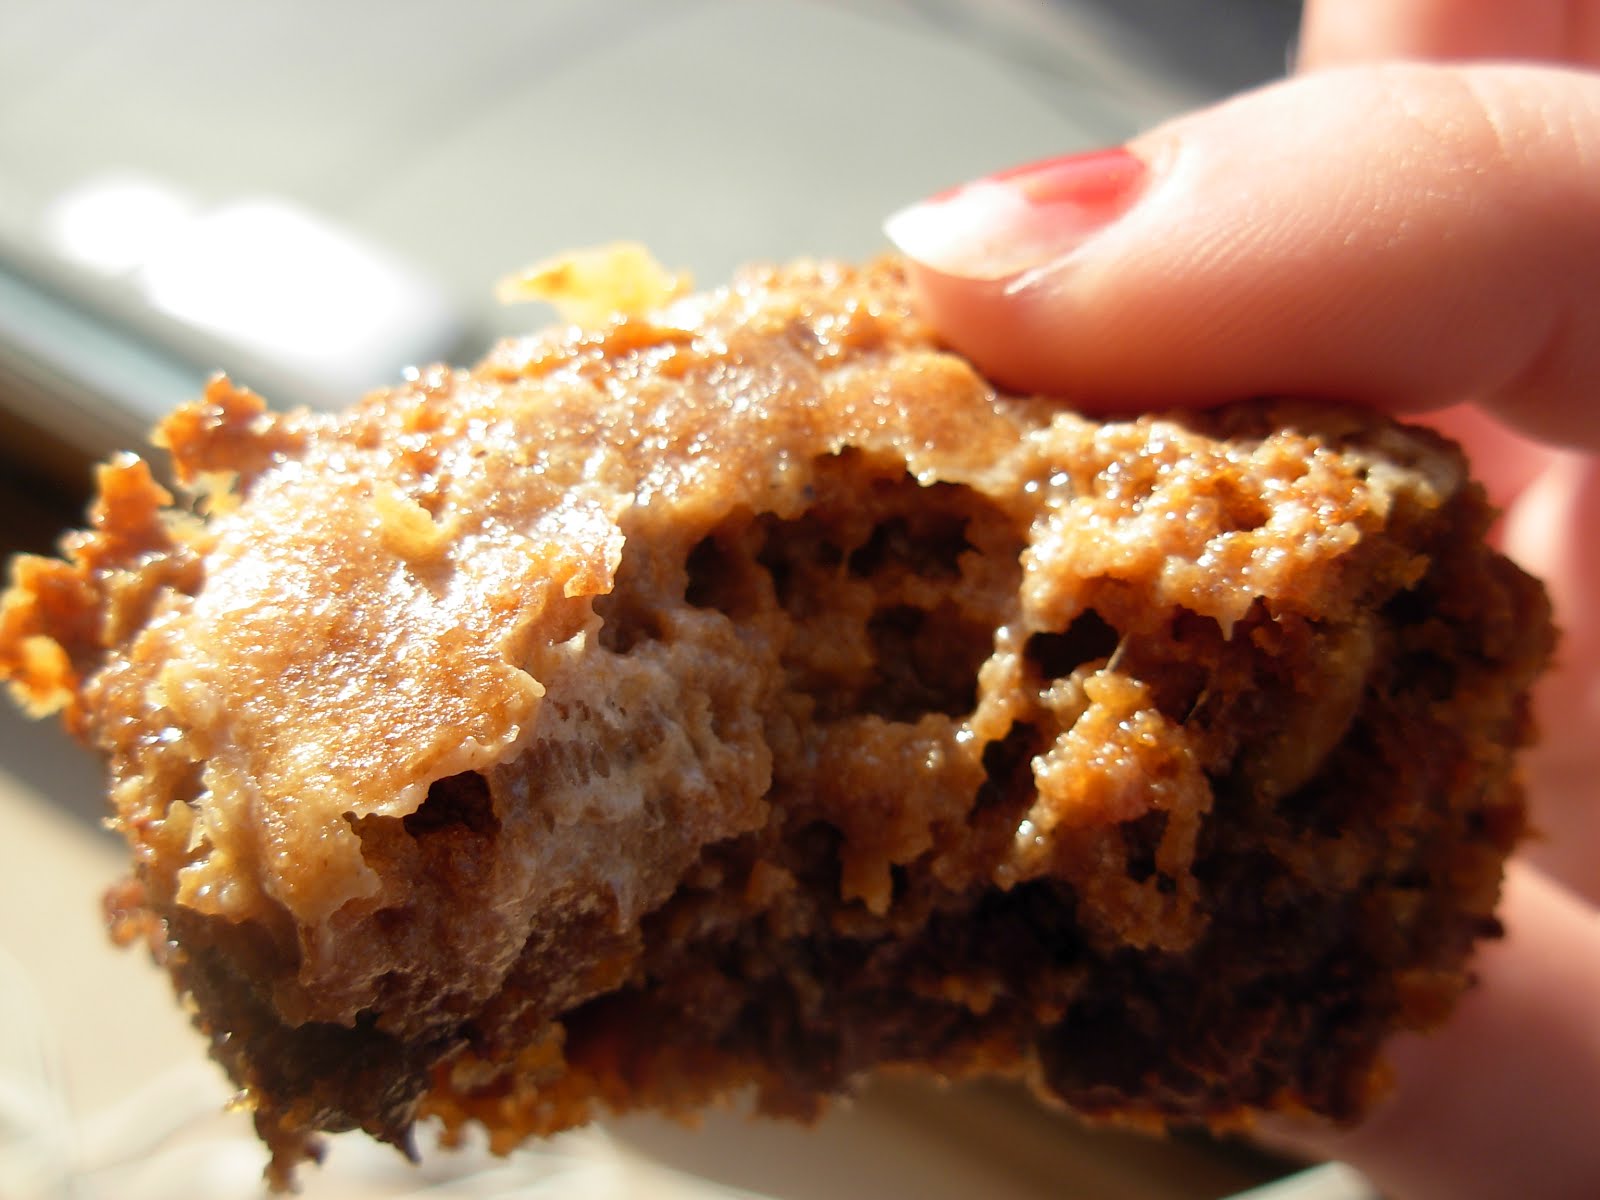
We celebrating St. Patrick's Day yesterday in the beautiful, clear-blue-sky, sunshiny weather, on a boat. Such perfect weather! We had a little barbecue, had a lot of fun, and I got to make cupcakes for the occasion. These were FANTASTIC! I'm always in the mood to bake cupcakes for people and this was my first time having a filled cupcake. These cupcakes have a Guinness chocolate cake base, filled with Jameson chocolate ganache, and topped with Bailey's buttercream. SO GOOD. SO SMOOTH. SO YOU MUST MAKE THIS NOW. Pretty sure my friends thought this was the best cupcake I have ever made.

This recipe easily made 12 cupcakes. I was afraid that there wasn't enough frosting, but there definitely was. Man that frosting is good.

Irish Car Bomb Cupcakes
Recipe from Better With Sugar

Cupcake:
1/2 C Guinness Stout
1/2 C unsalted butter, chopped
1/4 C + 2 TBS unsweetened cocoa powder
1 C all purpose flour
1 C granulated sugar
3/4 tsp baking soda
1/2 tsp salt
1 egg
1/3 C sour cream

Ganache Filling:
2/3 C semi sweet chocolate chips
1/3 C whipping cream (or heavy cream)
1 TBS butter, room temperature
1 tsp whiskey

Frosting:
1/2 C butter, room temperature
2-1/2 C icing sugar
3 TBS Irish Cream

Preaheat the oven to 350 degrees F. Line a cupcake tin with cupcake liners.

Make the cupcakes: Heat the Guinness and butter in a medium saucepan over medium heat until it's simmering, or the butter is melted and it just begins to bubble a bit.

Remove the pan from the heat, add the cocoa and whisk until it's smooth. Set aside to cool a bit.

In a separate bowl, stir together the flour, sugar, baking soda, and salt.

In another separate, large bowl, beat together the egg and sour cream.

Add the Guinness-chocolate mixture to the egg mixture, and beat just to combine.

Beat in the flour mixture.

Pour the batter into the prepared cupcake tin. Bake for 21-22 min, until a toothpick inserted comes out clean. Let cool on a rack.

Make the ganache: Heat the cream until simmering over low-med heat, then pour it over the chocolate chips. Let it sit for a minute, then stir it until smooth using a rubber spatula.

Add the butter and whiskey and stir until smooth again. Let the ganache cool until it has thickened up a bit but it still soft enough to be piped or spooned.

Cut out the centers of the cupcakes. I do this using the big open end of my 1M decorating tip. You could also use a sharp knife to cut a hole, going about 2/3 of the way down the cupcake.

You can either pipe the ganache into the holes in the cupcakes using a piping bag, or just spoon the ganache in.

Make the frosting: Using an electric mixer, whip the butter on med-high speed for a couple minutes. Add about 1/3 of the icing sugar and 1 TBS Irish Cream, beat on low. Repeat until all of the icing sugar and Irish Cream is mixed into the butter. Whip the frosting on med-high for another couple of minutes.

** Store in the fridge

Friday, December 20, 2013

Chocolate Bread Pudding For Two

Why has this recipe been sitting around waiting for me to post it? I made this back in AUGUST! I made this for my boyfriend's birthday--he loves bread pudding and I have never been a huge fan (I always want it to taste as magical as stuffing on Thanksgiving, but it's always a little too soggy or a little too crunchy and overall a little too disappointing for me). I decided to try to make it for him and it baked up wonderfully. It was perfectly cooked, tasted even better with ice cream, and this is a 2-person recipe! Okay, halfway through the dessert both of us realized we could probably have just split one it was so dense (could have also been that I cooked him a pretty big dinner).

I might try to make this again but given there are SO MANY bread pudding flavors and ideas and recipes out there, it might be a while.

Chocolate Bread Pudding For Two

2 cups (5-6 slices) 1/2-inch cubed challah bread
2/3 cup 2% reduced-fat milk
2 tablespoons sugar
1 1/2 tablespoons unsweetened cocoa
1 tablespoon Bailey’s Irish Cream
1/2 teaspoon vanilla extract
1/2 teaspoon cinnamon
1 large egg, lightly beaten
Cooking spray
2 ounces semisweet chocolate, coarsely chopped
Ice Cream or whipped cream (optional)

Preheat oven to 350°F. Arrange bread cubes in a single layer on a baking sheet. Bake for 5 minutes, or until toasted.

Combine milk, sugar, cocoa, Irish cream, vanilla, cinnamon and egg in a medium bowl. Whisk until thoroughly combined. Add toasted bread cubes and toss until coated. Cover with plastic wrap and refrigerate for at least 30 minutes or up to 4 hours.

Preheat oven to 325°F. Coat the inside of two 7-ounce ramekins with cooking spray. Divide half of the chilled bread mixture evenly between the two ramekins. Top with half of the chopped chocolate. Divide the remaining half of the bread mixture between the ramekins, then top with the remaining chocolate.

Place ramekins in an 8-inch pan and add about an inch of hot water. Bake, uncovered, for about 35 minutes or until set.

Serve warm, topped with ice cream or whipped cream.

Tuesday, November 26, 2013

Chocolate Angel Food Cake

Okay, okay. I haven't been very consistent with posting. I just do picture-dumps occasionally when I have some time and upload my photos and realize that hey, I actually took pictures of things I cooked or baked or whatever! I should upload them in bulk (and possibly forget about them)! I made this a while ago when my college roommate Lucy came to visit me in SF. She's not a fan of cake with frosting, and I know she's made angel food cake before, so I decided to give it a try.

I don't think I even know what angel food cake is supposed to taste like, but this didn't really fulfill my expectations. It was decent, but there was something about it (maybe the lack of a huge pile of frosting?) that made it not my ideal cake.

Chocolate Angel Food Cake
Recipe from u Try.it

Preheat oven to 325 degree F.  Place un-greased angel food cake pan on the baking sheet.  

In a large mixing bowl, sift cake flour, cocoa powder and 3/4 cup of sugar together.  

In the bowl of a stand mixer fitted with the whisk attachment, whip the egg whites, water, cream of tartar and salt together until foamy.   Then, add the remaining 1/2 cup of sugar in a steady stream. 

Add coffee mixture and vanilla extract, beat until stiff peak forms.

Sprinkle 1/4 to 1/2 cup of the dry ingredient mixture onto the egg white mixture.  With a rubber spatula, gently fold the dry ingredient into the meringue.  Be careful not to deflate the foam.

Pour batter into a 9 1/2-inch un-greased angel food cake pan. A 10-inch pan would work just as find if that's what you've got.

Bake for 45 to 50 minutes, or until a wooden skewer inserted into the middle of the cake and comes out clean.  Then, invert cake pan on a wiring rack too cool for at least one hour, or until completely cooled.  This step is to ensure the cake stays nice and tall in the cooling process.

Friday, February 15, 2013

Another actual update. MORE CUPCAKES!!

Now I remember why I took such a long break from baking.

Baking makes me fat.

I seriously cannot control myself.

But on a side note, look how cute!


These were for my birthday party last week. Dinosaur-themed yumminess.

Red velvet were the ones I made before, here.

The other ones are...dun-dun-dun...(besides magic)...

Chocolate Cupcakes with Salted Caramel Frosting
Recipe from Cooking Classy

2/3 cup cocoa powder
1 tsp baking soda
1 cup boiling water
1/2 cup butter, melted
1/3 cup vegetable or canola oil
1 3/4 cup granulated sugar
1 1/2 tsp vanilla extract
3/4 tsp salt
2 large eggs
2 large egg yolks
1/2 cup heavy cream
1 3/4 cup all-purpose flour
1 recipe Caramel Frosting, recipe follows

Salted Caramel Frosting:
1 cup salted butter, at room temperature
4 cups powdered sugar
3/4 cup Caramel Sauce, recipe follows (cooled completely)
1 tsp vanilla extract
1 tsp coarse sea salt, for sprinkling

Caramel Sauce:
1 1 /2 cups granulated sugar
1/4 cup + 2 Tbsp water
6 Tbsp salted butter
1 cup heavy cream

Preheat oven to 350 degrees. In large heat proof mixing bowl, whisk together cocoa powder and baking soda. Carefully pour in boiling water and whisk until bubbling subsides and mixture is well blended, allow to cool for 5 minutes.

Meanwhile, in a separate large mixing bowl, using an electric hand mixer set on low speed, blend together melted butter, vegetable oil, granulated sugar, vanilla and salt until well combined, about 30 seconds. Stir in eggs and eggs yolks, mixing just until combined after each addition. Blend in cocoa mixture then blend in heavy cream. Slowly mix in flour and blend until combined, while scraping down sides and bottom of bowl.

Divide batter among 24 paper lined muffin cups and bake in preheated oven until toothpick inserted into center comes out clean, about 18 - 20 minutes. Remove from oven and allow to cool in muffin tin several minutes before transferring to wire rack to cool. Cool completely then frost with caramel frosting, drizzle with room temperature caramel sauce (I poured the caramel sauce in a small Ziploc bag and cut a very small tip off end to drizzle) and sprinkle with coarse sea salt. Store in an airtight container.

For the salted caramel frosting:
In the bowl of an electric stand mixer fitted with paddle attachment, whip butter on medium-high speed until pale and fluffy, about 3 - 4 minutes. Add powdered sugar and blend on low speed until mixture comes together. Add caramel sauce and vanilla and whip on medium-high speed until light and fluffy about 2 minutes.

For the caramel sauce:
Gather all of your ingredients and have them nearby ready to add to the mixture as needed. In a heavy-bottomed 3 quart saucepan, heat sugar and water over moderately high heat whisking constantly to dissolve sugar. Once mixture reaches a boil, stop whisking and allow mixture to boil until it reaches a dark amber color, carefully swirling pan occasionally. Once mixture reaches a dark amber color, immediately add butter and whisk until butter has melted then immediately remove from heat. Wait 3 seconds then carefully pour in cream and immediately whisk to combine (it will bubble vigorously). Whisk until mixture is smooth. Allow caramel to cool several minutes then pour into a glass jar to cool completely and refrigerate.


Tuesday, February 12, 2013

Finally?!

Here's something I want y'all to take a look at:
MMM
UGH
OH GOD
So good.

Try it yourself!

Chocolate & Coconut Rum Cupcakes
Recipe from Half Baked Harvest


For the Cupcakes:
1 cup coconut flavored rum (ie Malibu)
1 cup unsalted butter
3/4 cup unsweetened cocoa powder
2 cups all-purpose flour
1 1/4 cups sugar
3/4 teaspoon salt
1 1/2 teaspoons baking soda
2 large eggs
2/3 cup greek yogurt

For the Frosting:
1 cup butter, softened
4 1/2 – 4 cups powdered sugar
1/4 cup coconut rum
1 tablespoon vanilla

Preheat oven to 350 degrees F, and line 2 standard cupcake pans with 24 liners.

In a large saucepan over medium heat, simmer coconut rum and butter. Slowly whisk cocoa powder into saucepan until mixture is creamy. Remove from heat and allow to cool.

Meanwhile, whisk sugar, flour, salt and baking soda in a large bowl.

In a separate bowl, beat eggs and greek yogurt with an electric mixer. Slowly add coconut rum and cocoa mixture. Combine on low speed.

Slowly add flour and sugar mixture, combining on low speed until completely incorporated.

Fill baking cups three-fourths full. Bake for about 22 minutes. Cool.

To make the frosting cream butter until smooth. Gradually add powdered sugar, alternating with rum and vanilla, until desired consistency is reached. Feel free to add more or less sugar or liquid based on how thick you want your frosting.

Tuesday, August 28, 2012

Espresso Chocolate Chip Shortbread

I'd been wanting to make these for a while and finally got a chance to. Very easy although a little time consuming to make, and very delicious with tea or even alone! I made them for the people working on our roof--probably wasn't the ideal thing to serve them, since they probably would have been fine with big simple chocolate chip cookies, but I really wanted to make these!


Espresso Chocolate Chip Shortbread
Recipe from Dorie Greenspan's Baking: From My Home to Yours
Found on Use Real Butter

1 tbsp instant espresso powder
1 tbsp boiling water
8 oz. unsalted butter, room temperature
2/3 cup confectioners’ sugar
1/2 tsp vanilla extract
2 cups all-purpose flour
4 oz. bittersweet chocolate, finely chopped OR 3/4 cup store-bought mini chocolate chips
confectioners’ sugar, for dusting (optional)

Dissolve espresso powder in boiling water. Set aside to cool to tepid.

Beat butter and confectioners’ sugar together on medium speed for about 3 minutes, until the mixture is very smooth. Beat in vanilla and espresso, then reduce mixer speed to low and add flour, mixing only until it disappears into the dough. Don’t work the dough much once the flour is incorporated. Fold in the chopped chocolate or chips with a sturdy rubber spatula.

Using the spatula, transfer dough to a gallon-size zip-loc bag. Put bag on a flat surface, leaving the top open, and roll the dough into a 9 x 10 1/2 inch rectangle that’s 1/4 inch thick. As you roll, turn the bag occasionally and lift the plastic from the dough so it doesn’t cause creases. When you get the right size and thickness, seal the bag, pressing out as much air as possible, and refrigerate the dough for at least 2 hours, or for up to 2 days.

Preheat the oven to 325°F. Put the plastic bag on a cutting board and slit it open. Turn the firm dough out onto the board (discard the bag) and, using a ruler as a guide and a sharp knife, cut the dough into 1 1/2-inch squares. Transfer the squares to the baking sheets and carefully prick each one twice with a fork, gently pushing the tines through the cookies until they hit the sheet.

Bake for 18 to 20 minutes, rotating the sheets from top to bottom and front to back at the midway point (I didn’t do that either – I bake one sheet at a time). The shortbreads will be very pale–they shouldn’t take on much color. Transfer the cookies to a rack. If you’d like, dust the cookies with confectioners’ sugar while they are still hot. Cool the cookies to room temperature before serving.

Makes about 3 dozen.

Monday, July 23, 2012

Individual Tiramisu

On Father's Day I asked my dad what his favorite desserts were. One of his top favorites was Tiramisu, so a few days later I made this for dessert. I like the idea of having individual desserts, and didn't want to use raw eggs, so when I found this recipe I knew I had to try it. It was a very easy tiramisu recipe--I do want to try making a large sized tiramisu with raw eggs to see how they compare, though--and super dense and creamy and delicious.

One fun fact about people here back home: I went to Safeway to find the ladyfingers (didn't want to make them from scratch since I was already cooking a dinner I'd never tried before), and everyone was so much nicer than I'm used to. I was walking around and people just asked if I needed help and were super happy about giving me help, and even when multiple people had to be asked to find the ladyfingers, everyone was very sweet. Even at checkout the lady and bagging-boy were so friendly. So not used to that, but it was a good change from the usual grumpiness back where I went to college!


Individual Tiramisu
Recipe (slightly adapted by me) from Foodiebride

Soaking Syrup
1/2 cup strongly-brewed coffee or espresso
1 Tbsp sugar

Filling
8 oz reduced-fat cream cheese
8 oz mascarpone
2 tsp vanilla
1/2 cup sugar
2 Tbsp strongly-brewed coffee or espresso
2 Tbsp milk

Assembly
6 5/6-oz clear cups
24 ladyfingers, purchased or homemade
1 oz semisweet chocolate, grated

In a small bowl, mix espresso and sugar, stirring until the sugar has disolved. Set aside to cool.

With your mixer, cream the mascaropone, cream cheese, vanilla, and sugar on medium-high for 3-5 minutes, until light and fluffy. The mixture should feel smooth (not gritty) when rubbed between your fingers.

Remove half of the mascarpone mixture and transfer it to a smaller bowl.

Add 2 Tbsp of espresso and mix well.

Add 2 Tbsp milk to the remaining filling and mix (this is just to thin the filling, the type of milk - whole, skim, etc - does not matter) well.

Trim the ladyfingers so that they come just below the top rim of the cups. Reserve the excess pieces. (The trimmed ends of the cookie are "the bottoms," the rounded uncut ends are "the top.")

Working with one ladyfinger and one serving at a time, quickly dunk the top half of the cookie into the soaking syrup and place in the plastic cup coffee-end (top) up.

Repeat with 3 more lady fingers, arranging them around the cup (if your ladyfingers are thin, you might need to use more than 4).

Place one of the reserved trimmed ends of the cookies into the bottom, followed by a spoonful of the espresso filling, the plain filling, and top with more ladyfinger pieces (when you run out of trimmed pieces, tear additional ladyfingers into small pieces to fit the next layer). Repeat 2 more times to fill the cup.

Sprinkle grated chocolate over the top.

Repeat the process for the remaining servings.

Loosely cover and refrigerate for a couple of hours before serving.

Tuesday, June 12, 2012

Andes Mint Cake

I made this cake for my friend Steven's birthday--the last birthday everyone celebrated at college, and the last time we all got together to party. It was a great time. I spent most of the day making it (it was also somewhat for my boyfriend, whose birthday was after graduation) and it was really worth it. The party was a surprise party for Steven: I was planning it for a while and some of my friends said they'd help out, so we got a handful of people invited to a Facebook event, but of course Steven has tons of friends so there was well over just a handful of people there. It was a funny surprise story though: we convinced him to come over but it took way too long to actually come because he was watching YouTube videos. My apartment was overheated and everyone was dying. We thought Steven might have a feeling we were doing a surprise party, so we shoved 2/3 of the people into my roommates' rooms, and when he got there about 7 of us yelled "surprise" and told him we were playing Birthday Settlers (of Catan). We started the game and then I "had to go to the bathroom", and instead of me coming back, one of Steven's friends who wouldn't have been in my apartment came out instead, and tricked Steven into being blindfolded. While blindfolded the rest of the guests came into the room, and when Steven took off the blindfold, somehow we had been quiet enough that he was really surprised to see everyone! So it was really successful--pretty proud of that surprise working out!

This cake's frosting didn't work perfectly. It was too soupy even after I put it in the freezer for a couple of hours. I think it was just way too hot in my apartment. I really want my cakes to turn out perfectly like the pictures the original maker posts, but mine always look lopsided...I guess they look more homemade, though. Even though people only got tiny slices of this cake (there were tons of people at the party!), I got lots of compliments on this one!


Andes Mint Cake
Recipe from mommiecooks

For the Cake:
1 8 Oz. Bag Andes Mints
1/2 Cup Cocoa Powder
3 Oz. Dark Chocolate
1 Cup Boiling Water
11/2 Sticks Unsalted Butter (12 Tbsp or 3/4 pd)
11/2 Cups White Sugar
1/2 Cup Brown Sugar
3 Eggs
1 tsp Vanilla
1 Cup Mayonnaise
3 Cups Flour
11/4 tsp Baking Powder
1/2 tsp Baking Soda
1/2 tsp Salt

For the Frosting:
6 Egg Whites
11/4 Cup White Sugar
3 Sticks Room Temperature Butter (24 Tbsp or 1.5 pounds)
1 tsp Vanilla
1/2 tsp Almond Extract
1/4 Cup Cream

Toss about 3oz. of the andes candies into a bowl along with the cocoa powder and dark chocolate.

Pour the boiling water over the top and allow the chocolate to melt completely.

In a large mixing bowl cream the butter and the two sugars.

Mix in the eggs and vanilla.

Add in the mayonnaise.

In a separate bowl combine the flour baking powder, baking soda and salt.

Alternate adding the flour and then the liquid chocolate to the creamed mixture, mixing after each addition.

Pour batter into three prepared 9" cake rounds and bake at 350 degrees for 25 minutes or until a toothpick comes out clean. Let cool.

For the frosting mix together the egg whites and the sugar.

Place into a double boiler and heat until the temperature reaches 160 degrees, whisking often.

Transfer to a mixing bowl and whisk on medium high until stiff, glistening and room temperature; about 5 minutes.

Cube up the butter and add it in a bit at a time while whisking on medium speed.

If your frosting separates, simply up the speed and give it a minute or two to come back together.

Add in the vanilla and almond extract.

Frost the cooled cake.

Reserving about 8 of the remaining mints, place the rest into a double boiler along with the cream.

Once melted, remove from heat and let rest about 5 minutes to cool down. Drizzle over the top of the cake.

Chop the reserved mints and sprinkle over the top of the cake.

Monday, April 23, 2012

Cookies and Creme Oreo Cake

It's my friend Jimmy's birthday today, so yesterday I made him this cake. Overall I think it was really delicious--I wish I'd used better quality butter because in the frosting it looked grainy, but it didn't taste at all grainy. I thought it'd just taste like chocolate cake in the end but it really tasted oreo-like! It was really good! I think I'd like to try making it with four 8-inch layers next time, and maybe make the cake a little more moist (or maybe splitting the layers would do that for me!) but I thought it was really good--the frosting was excellent, I think I'm really liking this flour-frosting recipes!

For this recipe I used two 9-inch cake pans and baked them for 3-5 minutes less. I think less oreos could be crushed, too.


Cookies and Creme Oreo Cake
Recipe adapted by Sunny Side Up in San Diego from Family Circle Magazine

Cake
1 1/4 cups All-purpose Flour
2/3 cup Dutch-process cocoa powder (or Hershey's Special Dark)
1 1/2 tsp Baking Soda
1/2 tsp Baking Powder
1/2 tsp Salt
3/4 cup Unsalted Butter
1 1/2 cups Sugar
1 tsp Vanilla
3 large Eggs, room temperature
1 1/4 cups Buttermilk

Frosting
Scant 1/2 cup Flour
1 1/2 cups Milk
2 tsp Vanilla
1 1/2 cups (3 sticks) Butter, softened
1 1/2 cups Granulated Sugar
25-30 oreos

Preheat oven to 350 degrees. Prepare two 8-inch cake pans with butter and flour.

Into a medium bowl, sift together flour, cocoa powder, baking soda, baking powder, salt. Set aside.

In the bowl of a standing mixer, or a large bowl using a hand held mixer, beat together the butter, sugar, and vanilla until light and fluffy. About 3 minutes. Add the eggs one at a time, beating until incorporated and scraping down sides as needed.

With mixer on low speed, add 1/3 of the dry ingredients, mix until incorporated. Then add 1/2 of the buttermilk, mix until incorporated. Repeat until the last 1/3 of flour has been used. Mix until incorporated and then beat for 1 additional minute.

Divide the batter evenly between the two prepared pans. Bake for 35-40 minutes, or until a toothpick inserted into the center comes out clean and the sides begin to pull away from the edges. Allow to cool in the pan on a wire rack for 10 minutes. Turn the cakes out onto the racks and allow the cakes to cool completely.

While the cakes are baking, prepare the frosting. In a saucepan, whisk together the flour and milk and cook over medium heat until the mixture thickens (I would compare it to mashed potatoes). It is very important to whisk continuously so clumps don't form. This took me about 4-5 minutes, but it's best to go by texture.

Set milk mixture aside in an ice bath and allow to cool completely.

In a medium bowl, (or bowl of a standing mixture fitted with a whisk) beat together the butter and granulated sugar until light and fluffy. Add the vanilla and beat for 1 minute. Add the cooled milk mixture and beat on high for 3-5 minutes. If it looks separated, keep beating.

Cake Assembly
When the cakes are completely cool, cut each cake in half* horizontally. Use 1/3-1/2 cup of frosting to fill between each layer. When all the layers are stacked, set aside 1/2 cup of frosting then use rest to frost the outside.

Using a ziploc bag and a rolling pin, crush all but 6 of the Oreo cookies. Apply the cookie crumbs to the sides of the cake**.

Use the reserved 1/2 cup of frosting to create 6 swirls on the top of the cake, place a cookie in each swirl.

*If you don't have cake leveler tool, you can use a knife to score the cake half way up all the way around. Then place a clean piece of fishing wire or floss in the groove and slice away.

**I set my cake plate over a large piece of parchment paper to catch the extra crumbs. It can get a little messy.

Thursday, April 5, 2012

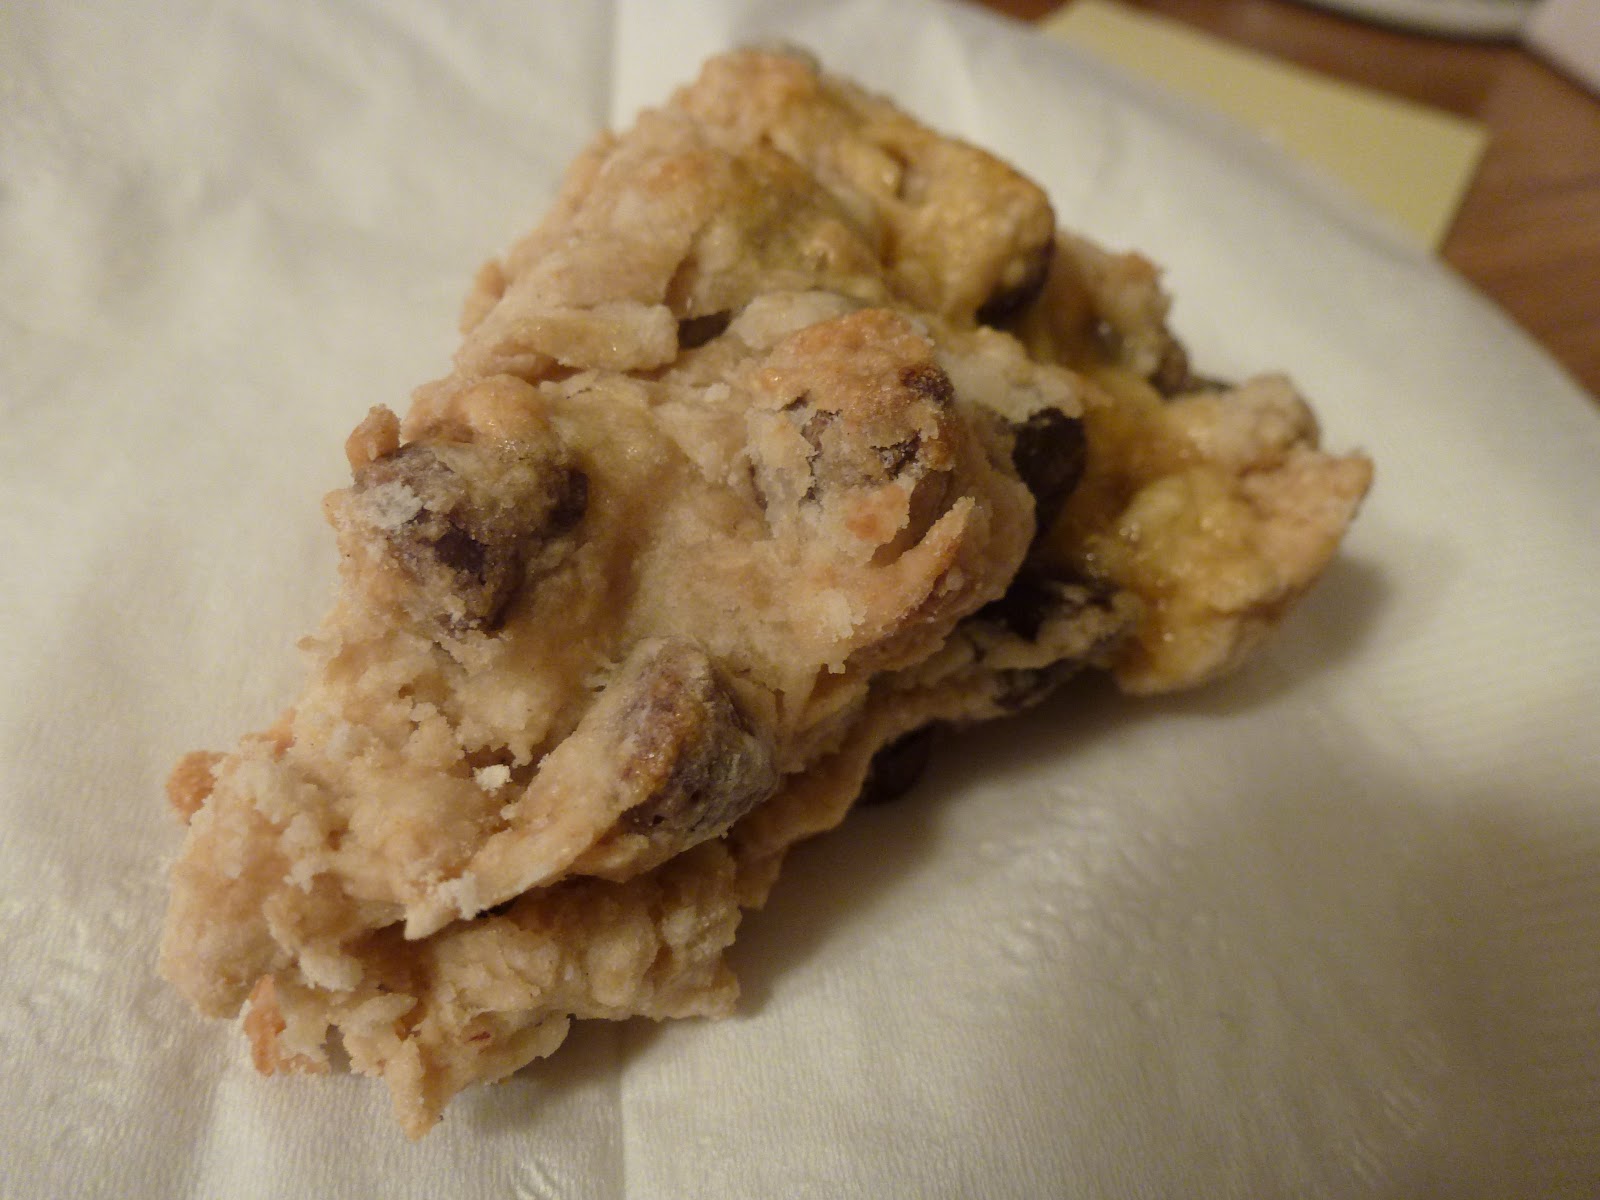
Brown Sugar Chocolate Chip Scones

Just realized I forgot to top my scones with sugar--oops, but they were sweet enough without it. It probably didn't need the egg coating either. I've been so busy lately! I haven't really got a chance to bake at all, and 3 weeks ago I promised my friend Philip that I'd bake him something for his birthday...and still haven't. I made these because hey, breakfast is easy to make and eat. I wanted to make some other breakfasty bread but I have no food and the only special food this required was chocolate chips, which I could easily buy. I substituted milk and a pinch of vinegar for the buttermilk and there didn't seem to be a difference.

These were perfect warm, but I'm not sure if I'd make them again because the next day they weren't as good. They were soft and crumbly the day-of though, so if you're planning on serving to a group, these were super easy!

Brown Sugar Chocolate Chip Scones
Yield 8 scones
Recipe from evilshenanigans

2 cups all purpose flour
1/3 cup packed light brown sugar
1 teaspoon baking powder
1/4 teaspoon baking soda
1/4 teaspoon salt
6 tablespoons butter, cut into small pieces and kept very cold
1 cup semi-sweet chocolate chips
1/2 cup cold buttermilk
1 teaspoon vanilla
1 egg, well beaten
Sugar for topping

Heat the oven to 400 F and line a baking sheet with parchment paper.

In a medium bowl combine the flour, sugar, baking powder, baking soda, and salt.

Add the cold butter and rub it in with your fingers until the butter is in small pieces, no larger than peas. Add the chocolate chips and mix well.

Pour in the cold buttermilk and vanilla and mix until the liquid is absorbed. The dough will look very dry and shaggy.

Turn out onto a cutting board and knead the dough three times by pressing the dough into a fat disk, folding the dough in half, turning it 1/4 turn and repeating. Do not over knead.

Once kneaded press into an 8″ circle and cut the disk into 8 wedges. Places the wedges on the prepared baking sheet and brush with beaten egg. Top each scone with as much sugar as you like.

Bake the scones for 15 – 18 minutes, or until the tops are golden brown. Cool ten minutes on the pan before transferring to a wire rack.

Thursday, March 8, 2012

Vanilla-Rich Chocolate Chip Cookies

Yes, I do already have a favorite chocolate chip cookie. But when my mom visited me over about a month ago, she brought me a huge, costco-sized bottle of vanilla extract...so what was I going to do? Find recipes that call for a LOT of vanilla.

And I found this recipe.

So I tried it, despite already having a favorite CCC. My favorite didn't change, but these are definitely a good one to try! They aren't as big but they're very flavorful. Crunchy on the outside, soft on the inside. They were also very easy to make! If you want a new CCC recipe to try, these are easy and tasty to make!


Vanilla-Rich Chocolate Chip Cookies
Recipe by My Tasty Treasures
Found on Ice Cream Before Dinner

3¼ cups flour
1 teaspoon baking soda
¾ teaspoon salt
1⅓ cups butter, softened
1¼ cups granulated sugar
1 cup firmly packed light brown sugar
2 eggs
4 teaspoons Pure Vanilla Extract
1 package (12 ounces) semi-sweet chocolate chips

Preheat oven to 375°F. Mix flour, baking soda and salt in medium bowl. Set aside. In the bowl of an electric mixer, beat butter and sugars in large bowl on medium speed until light and fluffy. Add the eggs and vanilla; mix well. Gradually beat in the flour mixture on low speed until well mixed. Stir in chocolate chips.

Drop by rounded tablespoons (I used a 1 1/2 Tablespoon cookie scoop) about 2 inches apart onto parchment-lined baking sheets.

Bake 8 to 10 minutes or until barely beginning to brown at the edges. Cool on baking sheets 1 minute. Remove to wire racks; cool completely.

Tuesday, February 21, 2012

Yellow Cake with Chocolate Buttercream Frosting and Mousse Filling

I can't remember what book this recipe is from, but I made it for my mom's bookgroup get-together. It's a pretty basic yellow cake with pretty basic chocolate buttercream, and then because I wanted to use my new cake pan (which you can buy on Amazon), I made a basic mousse center. It was pretty good!


Friday, February 17, 2012

Nutella Thumbprint Cookies

I didn't get to try any of these either! You can probably tell we had a lot of nutella when I was at home this winter...I made these for, not my mom's this time, but my dad's work. They finished it all so they must have been good! I can't imagine they wouldn't be...basically a chocolate chip thumbprint cookie base with nutella swirled in the middle? Mmm. These were easy to make, too!


Nutella Thumbprint Cookies
Recipe from Eyes Bigger than my Stomach

1/2 cup butter
1/2 cup brown sugar
1 large yolk
1/4 tsp salt
1 tsp vanilla
1 cup plus 2tbsp flour
1/3 cup chopped chocolate
Nutella for filling

Cream butter and sugar until fluffy

Add egg yolk, vanilla, salt and mix

Add flour and beat on low speed

Add chocolate

At this point, you can freeze the dough for up to a month if you want

Form dough into balls

Place on parchment paper or a silpat baking sheet

Make a “thumbprint” depression and fill with Nutella

Place in freezer for 15 minutes

Bake at 350 for 12-15 minutes

Friday, February 10, 2012

Almond Joy Cookies

Some of my friends liked these, but I thought they were a little too dark-chocolate for my taste...I didn't get the flavor of almonds or coconut. I don't think I'll make these again but they were fine if you like dark chocolate. I guess they just didn't do well against the other two chocolate cookies that I made as part of the four batches of cookies I made for my friends before winter break!


Almond Joy Cookies
Recipe from Can you Stay for Dinner?

6 ounces unsweetened chocolate, chopped
4 tablespoons unsalted butter
1/4 cup flour
1/4 teaspoon baking powder
1/4 teaspoon salt
2 large eggs
1 1/3 cups sugar
2 teaspoons vanilla extract
1/2 cup chopped almonds
1 cup sweetened, flaked coconut

Whisk flour, baking powder, and salt in a bowl. Set it aside.

In a small bowl, microwave the chopped chocolate and butter for 1 minute at high power. Stir and continue to microwave at 15 second intervals until the mixture has melted. Be careful not to burn your chocolate.

In a large bowl, beat eggs with sugar and vanilla until well blended, about 3 minutes. Stir in melted chocolate mixture. Scrape down the sides of the bowl to mix well. Stir in flour mixture. The dough will be thick. Add chopped almonds and coconut and stir to incorporate.

Cover the dough and refrigerate it for 30 minutes. This will allow it to firm up and rest, for a chewier cookie center.

Preheat the oven to 350 degrees F. Line two cookie sheets with parchment paper and set aside. Shape the dough into balls roughly 2 tablespoons in size. Roll them between your palms and flatten them slightly with your fingertips. Space two inches apart on the baking sheet and bake for 8-10 minutes, until they’ve puffed and begun to look dry and cracked on top. Remove to cool on a wire rack.

Monday, February 6, 2012

Marshmallow Bars

I made these bars as one of the four batches of cookies I made for my friends before winter break. I think my friends liked them a lot more than I did, which was good--they were definitely different. They were also the only not-as-chocolaty cookie that I made for my friends...I would have made fewer chocolate cookies but didn't have the right ingredients for anything I felt like making, haha. These were really easy!


Marshmallow Bars
Recipe from Allrecipes

1 cup shortening
3/4 cup sugar
3/4 cup packed brown sugar
2 eggs
1 teaspoon vanilla extract
2 1/4 cups all-purpose flour
1 teaspoon baking soda
1 teaspoon salt
2 cups miniature marshmallows
1 1/2 cups semisweet chocolate chips
3/4 cup chopped walnuts

In a mixing bowl, cream shortening and sugars. Add eggs, one at a time, beating well after each addition. Beat in vanilla.

Combine the flour, baking soda and salt; gradually add to creamed mixture. Stir in marshmallows, chips and walnuts.

Spread into a greased 13-in. x 9-in. x 2-in. baking pan. Bake at 350 degrees F for 25-30 minutes or until golden brown.

Cool on a wire rack. Cut into bars.

Sunday, February 5, 2012

Moosewood Vegan Chocolate Cake

I still have things I baked over winter break, but I'm leaving those for a bit to make a post about this cake I made for my roommate Lucy on her 22nd birthday late January. We went to Moosewood Cafe a few months ago and loved their cake, so I tried to find the recipe to make it on my own. It was pretty easy--not perfect, and I think it would have gone best in a 9-in square pan instead of the 9-in circular pan the recipe calls for because the glaze kind of spilled over, but it was a good cake. It's best eaten the day-of.

Because the recipe is in the Moosewood Restaurant Book of Desserts, you can find the recipe reprinted here: Moosewood Cooks.


Friday, February 3, 2012

Chocolate Truffle Cookies

Long time no post! Sorry--Winter break came around and I got really busy, things happened, and suffice to say I got really distracted from posting on this blog. But I do have a lot of new recipes to post now! I didn't bake too much, but I have 8 recipes to share, and planning on trying a new recipe next week.

Right before I left for Winter Break I made four batches of cookies in one day, separated them onto foiled pieces of cardboard, and delivered them to a lot of college friends. I tried three new recipes (this is one of them) and then Chocolate Crinkle Cookies which I made last year.

Here are the Chocolate Truffle Cookies! I think I liked these best of the four I made (the other two I'll post about later!). The original recipe suggests I cover them in powdered sugar but they were already pretty sweet so I kept them plain. Maybe not the prettiest cookies, but they definitely melt in your mouth and taste like truffles!


Chocolate Truffle Cookies
Recipe adapted by What Megan's Making from Baking Bites

1 1/4 cups butter, room temperature
2 cups confectioners’ sugar
1/3 cup unsweetened cocoa powder
1/4 tsp salt
1/4 cup sour cream
1 tsp vanilla extract
2 1/4 cups all purpose flour
2 cups chocolate chips
approx. 1/3 cup cocoa powder (for rolling)
approx. 2/3 cup confectioners’ sugar (for rolling) (I didn't add this)

Preheat oven to 325F. Line a baking sheet with parchment paper.

In a large bowl, cream together butter and sugar. Sift in cocoa powder and salt, and mix well. Beat in sour cream and vanilla extract. With the mixer on low, blend in flour. Stir in chocolate chips.

Shape the dough into 1-inch balls and roll in the cocoa powder and place on baking sheet. (If the dough is hard to handle, refrigerate the dough for 30-60 minutes before shaping the cookies.) Bake for 10 minutes or until cookies are just barely set. Let cool on baking sheet for 3-5 minutes, then transfer to a wire rack to cool completely.

When cookies have reached room temperature, after about 30-45 minutes, roll in powdered sugar until completely coated (I didn't think it was necessary). Store in an airtight container.

Sunday, December 18, 2011

Coca Cola Cake

This cake was so ugly I was embarrassed that I was bringing it to my friend's birthday party. Don't look. It's ugly. But it was GOOD. It was so so so good. I brought it for a friend (obviously turning 21--I kinda stuck that on with a plastic bag, which is why I didn't go in detail with his name or anything since it was hard enough to get the pink frosting out to write a number) who loves soda, so I figured a Coke cake would be good. It didn't really taste like coke, but it was really really good. People thought it was delicious albeit a little sweet. I might not ever make this cake again (because it turned out so ugly! Maybe cuz I didn't garnish it with nuts?), but it was definitely good!


Coca Cola Cake
Recipe from Southern Living

1 cup Coca-Cola
1/2 cup buttermilk
1 cup butter or margarine, softened
1 3/4 cups sugar
2 large eggs, lightly beaten
2 teaspoons vanilla extract
2 cups all-purpose flour
1/4 cup cocoa
1 teaspoon baking soda
1 1/2 cups miniature marshmallows
Coca-Cola Frosting
Garnish: 3/4 cup chopped pecans, toasted

Combine Coca-Cola and buttermilk; set aside.

Beat butter at low speed with an electric mixer until creamy. Gradually add sugar; beat until blended. Add egg and vanilla; beat at low speed until blended.

Combine flour, cocoa, and soda. Add to butter mixture alternately with cola mixture; begin and end with flour mixture. Beat at low speed just until blended.

Stir in marshmallows. Pour batter into a greased and floured 13- x 9-inch pan. Bake at 350° for 30 to 35 minutes. Remove from oven; cool 10 minutes. Pour Coca-Cola Frosting over warm cake; garnish, if desired.

Note: Don't make the frosting ahead--you need to pour it over the cake shortly after baking.

Saturday, November 19, 2011

Chocolate Cake with Cream Cheese Frosting

On the 11th was my friend's birthday, so the night before I made this cake for her birthday party. I wanted something easy that I had ingredients for or could easily get ingredients for, and this worked!

I used the same recipe for the cake as I did here except that I only used 2 layers. I still baked it for 30-35 minutes and it worked fine. I also used parchment paper which is a MUST. But everything else for that cake is the same--it's probably my favorite chocolate cake recipe now.

For the cream cheese frosting, I was originally going to make a red velvet cake for her but then the convenience store didn't have red food coloring, but I still stuck with a cream cheese frosting since I had all the ingredients for that. The cream cheese frosting recipe I tried was a new one, posted below. It was really great and I think it complemented the cake nicely...although I didn't eat the cake...so somebody who did get to try it should comment and let me know! It had a stronger cream cheese flavor than my other favorite used with these cupcakes. Ignore the lettering for her name--I didn't have food coloring so I just added some cocoa and was trying to rush so it looks ugly. That doesn't matter, because the taste was all that counted!


Cream Cheese Frosting
Recipe from Pinch My Salt

16 oz. cream cheese (2 packages), softened
1/2 cup unsalted butter (one stick), softened
1 teaspoon vanilla extract
2 1/2 cups powdered sugar, sifted
pinch of salt

With an electric mixer, blend together cream cheese and butter until smooth. Turn mixer to low speed and blend in powdered sugar, salt and vanilla extract. Turn mixer on high and beat until light and fluffy. Use immediately or refrigerate, covered, until ready to use. If refrigerated, the frosting will need to be brought to room temperature before using (after frosting softens up, beat with mixer until smooth).